No floor plan image? Build the plan from your own measurements. The first room you add sets the scale, so there is nothing to calibrate.
- 1
Measure each room
Before you start, go through each room with a tape measure, so you have the numbers to type in.
- The width and the depth, from wall to wall.
- The length of each wall, if the room is not a rectangle.
- For each door and window, its width and its distance from the nearest corner.
- 2
Add a room by its size
Open use.layoutr.app, no account needed, and click Add a room. Give it a name, pick meters, feet or inches, type the width and the depth, and press Add.
use.layoutr.app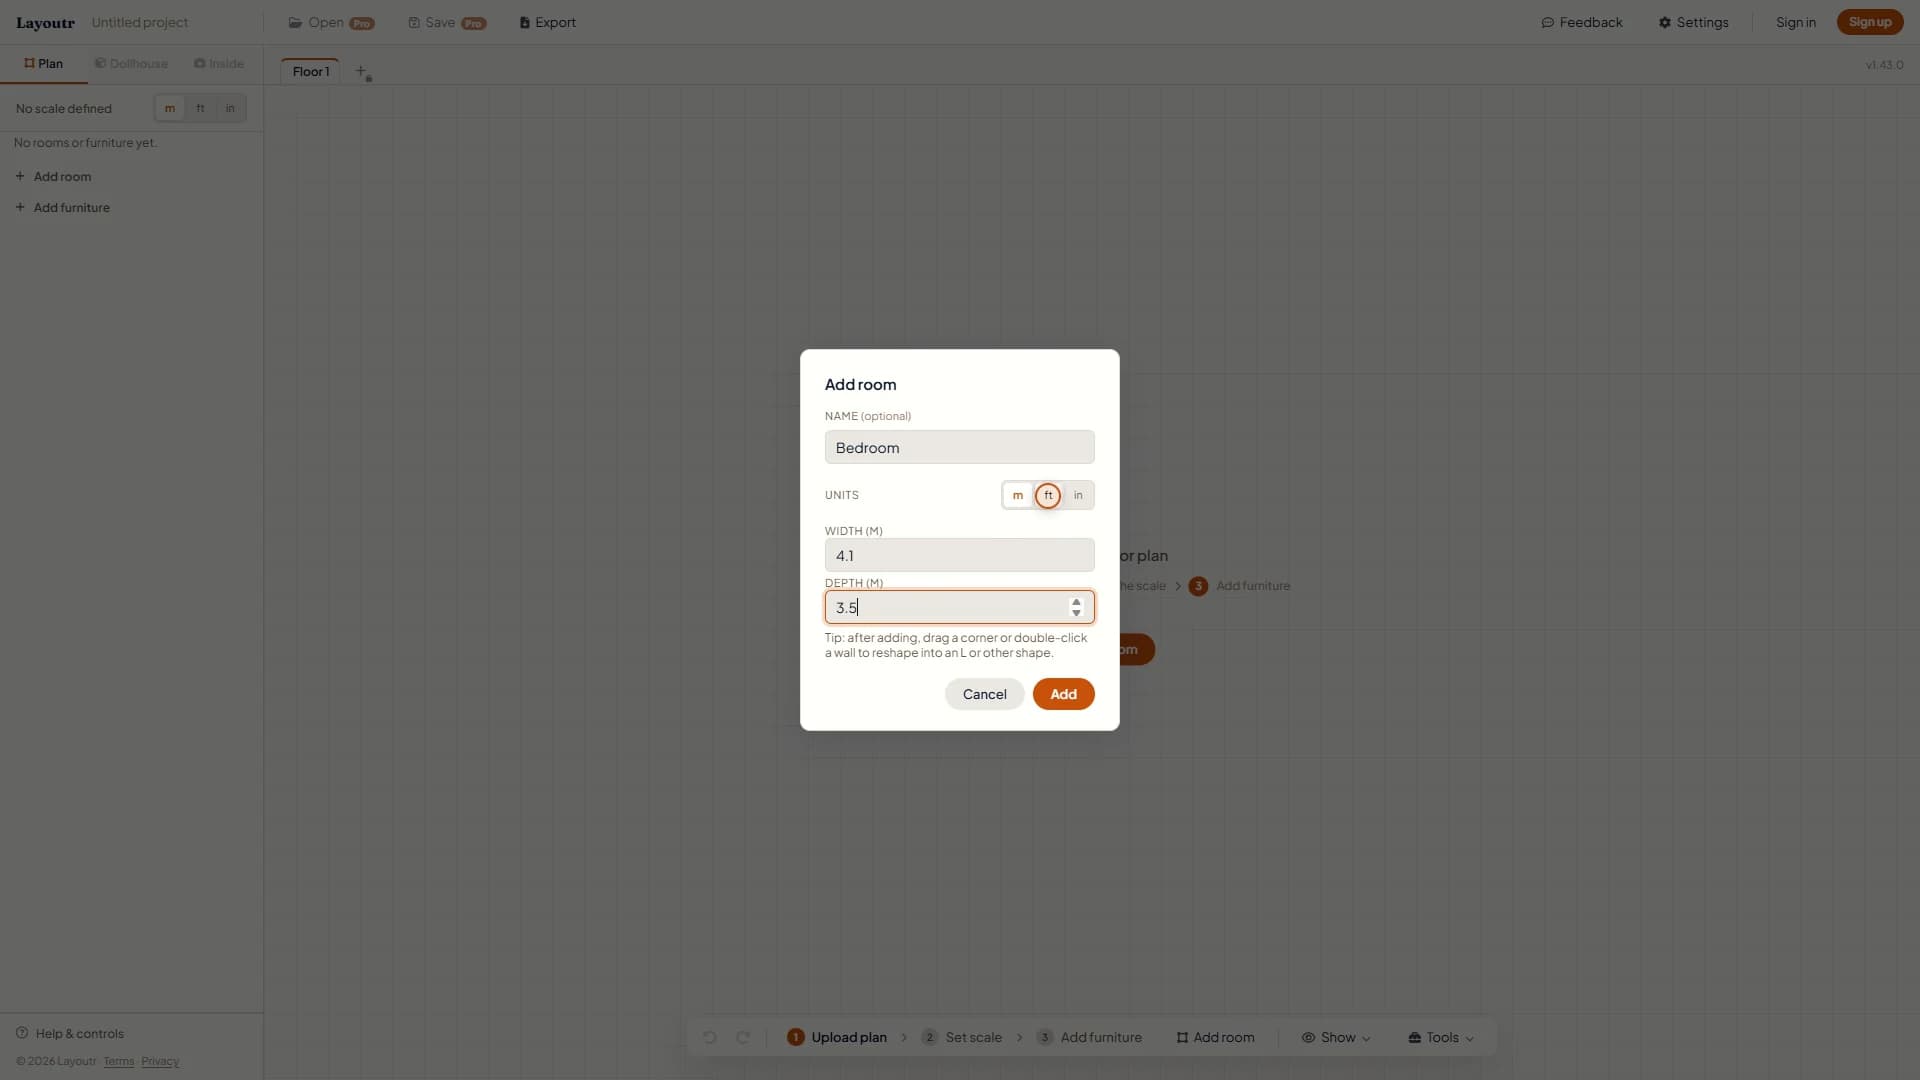
Example: a bedroom of 4.1 × 3.5 m (13 ft 5 in × 11 ft 6 in). - 3
Fit the corners
If the room is not a rectangle, select it and shape the outline until the wall lengths match your notes.
- Double-click a wall to add a corner.
- Drag a corner to move it. The wall lengths update as you drag.
- To take a corner out, click it and press Remove corner.
use.layoutr.app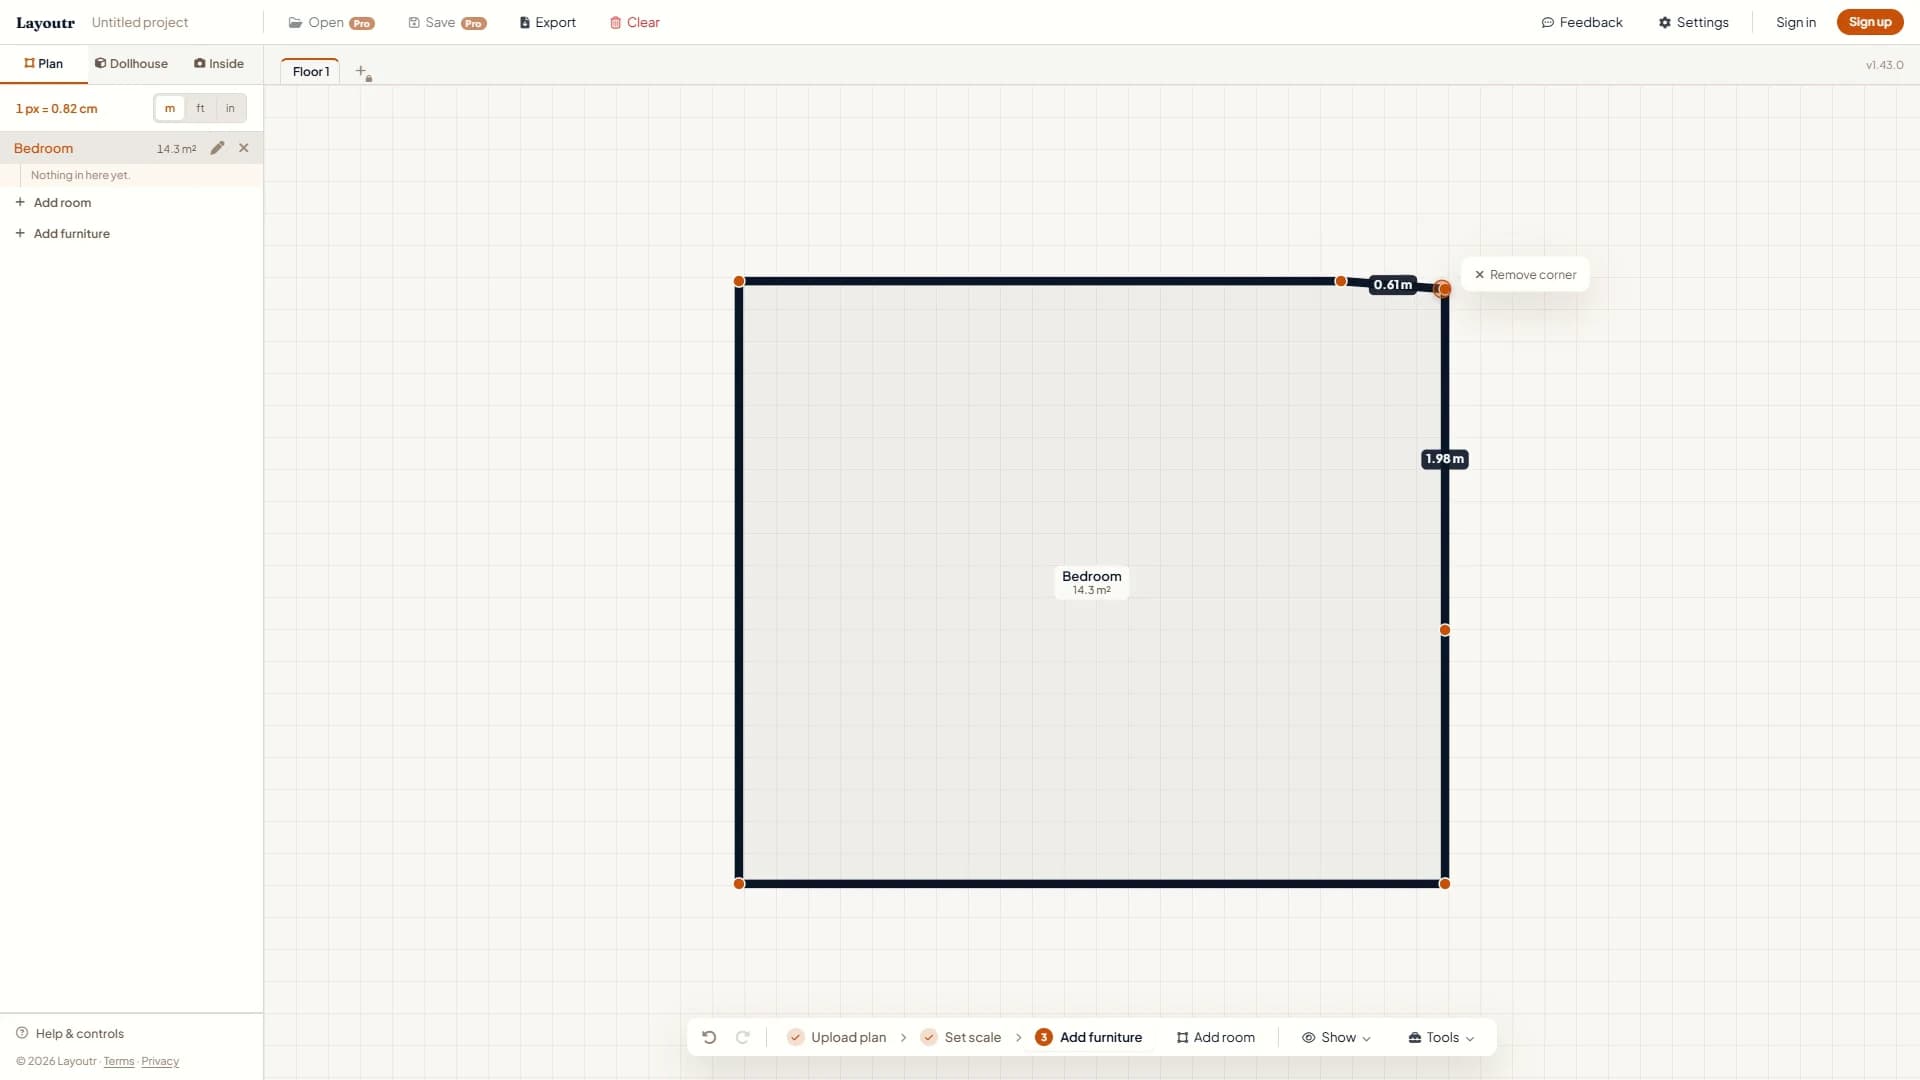
Example: a corner taken out for the bathroom, with new walls of 0.61 m (24 in) and 1.98 m (6 ft 6 in). - 4
Add the windows
With the room selected, pick Window from the bar. Drag it along the wall and pull its ends to its real width. The labels show its distance to each corner, so you can match your notes.
use.layoutr.app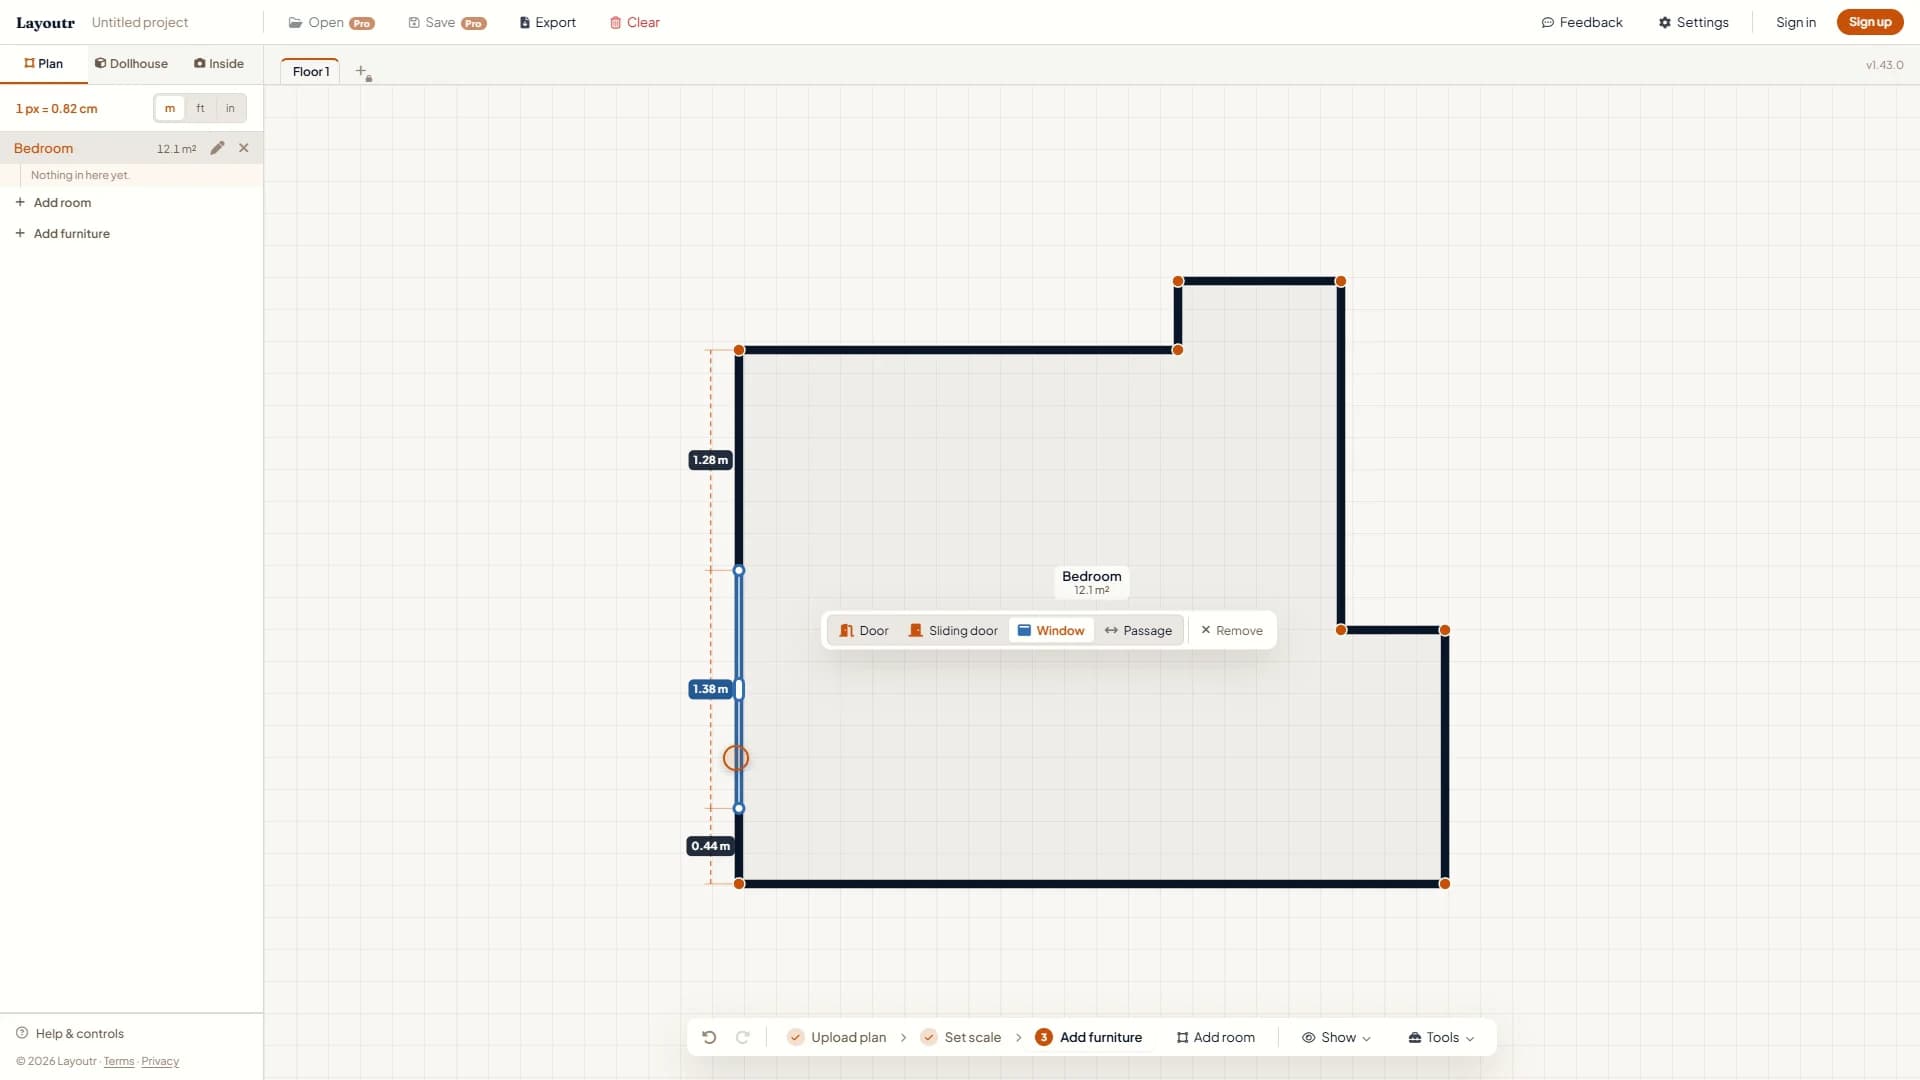
Example: a 1.38 m (4 ft 6 in) window, placed by its distance to the corners. - 5
Add the doors
Add doors the same way with Door or Sliding door, and use Passage for an opening without a door. Doors show where furniture cannot go, like in the swing of a door, and they appear in 3D along with the windows.
use.layoutr.app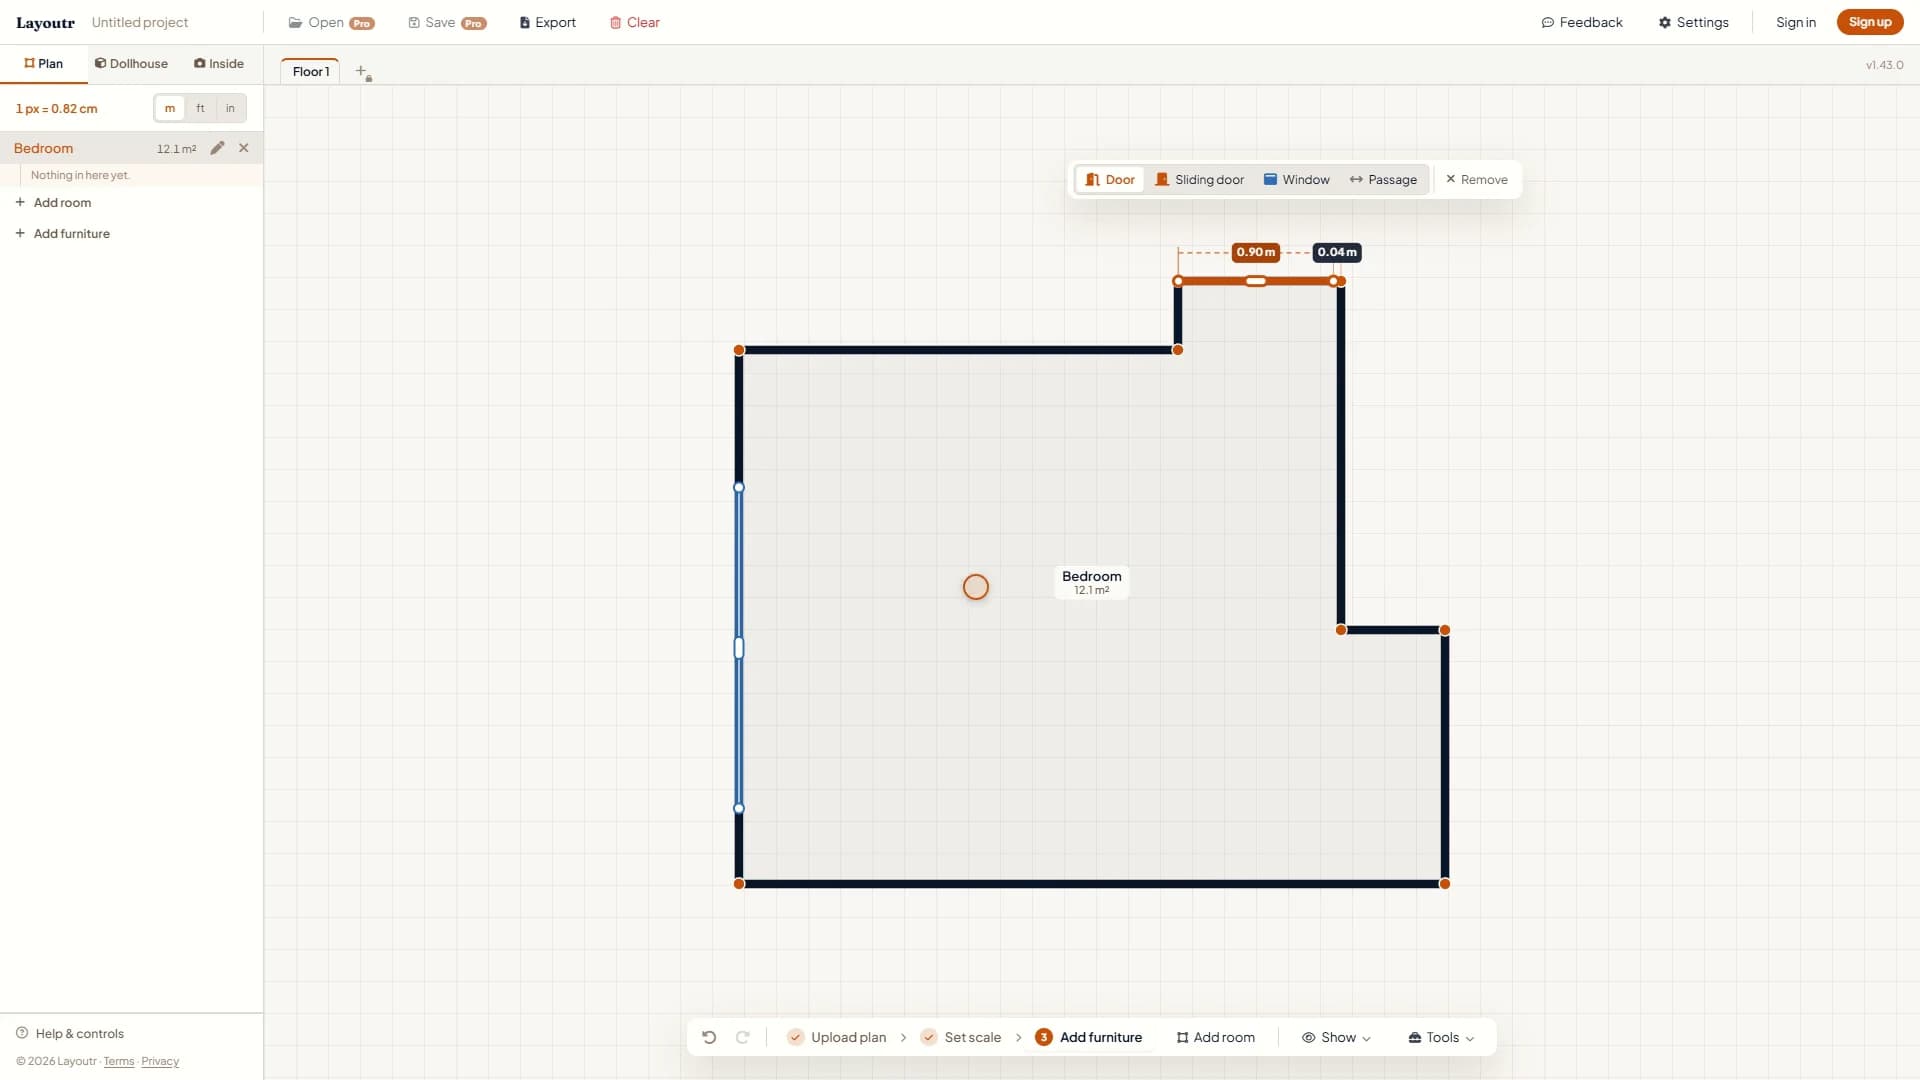
Example: a 0.90 m (35 in) door in the nook at the top of the room. - 6
Place your furniture
Click Add furniture and pick a piece, then resize it to match yours, or make one to size under Free form. The free plan places up to three pieces per floor. Moving, turning and measuring the space around a piece work the same as on an uploaded plan.
use.layoutr.app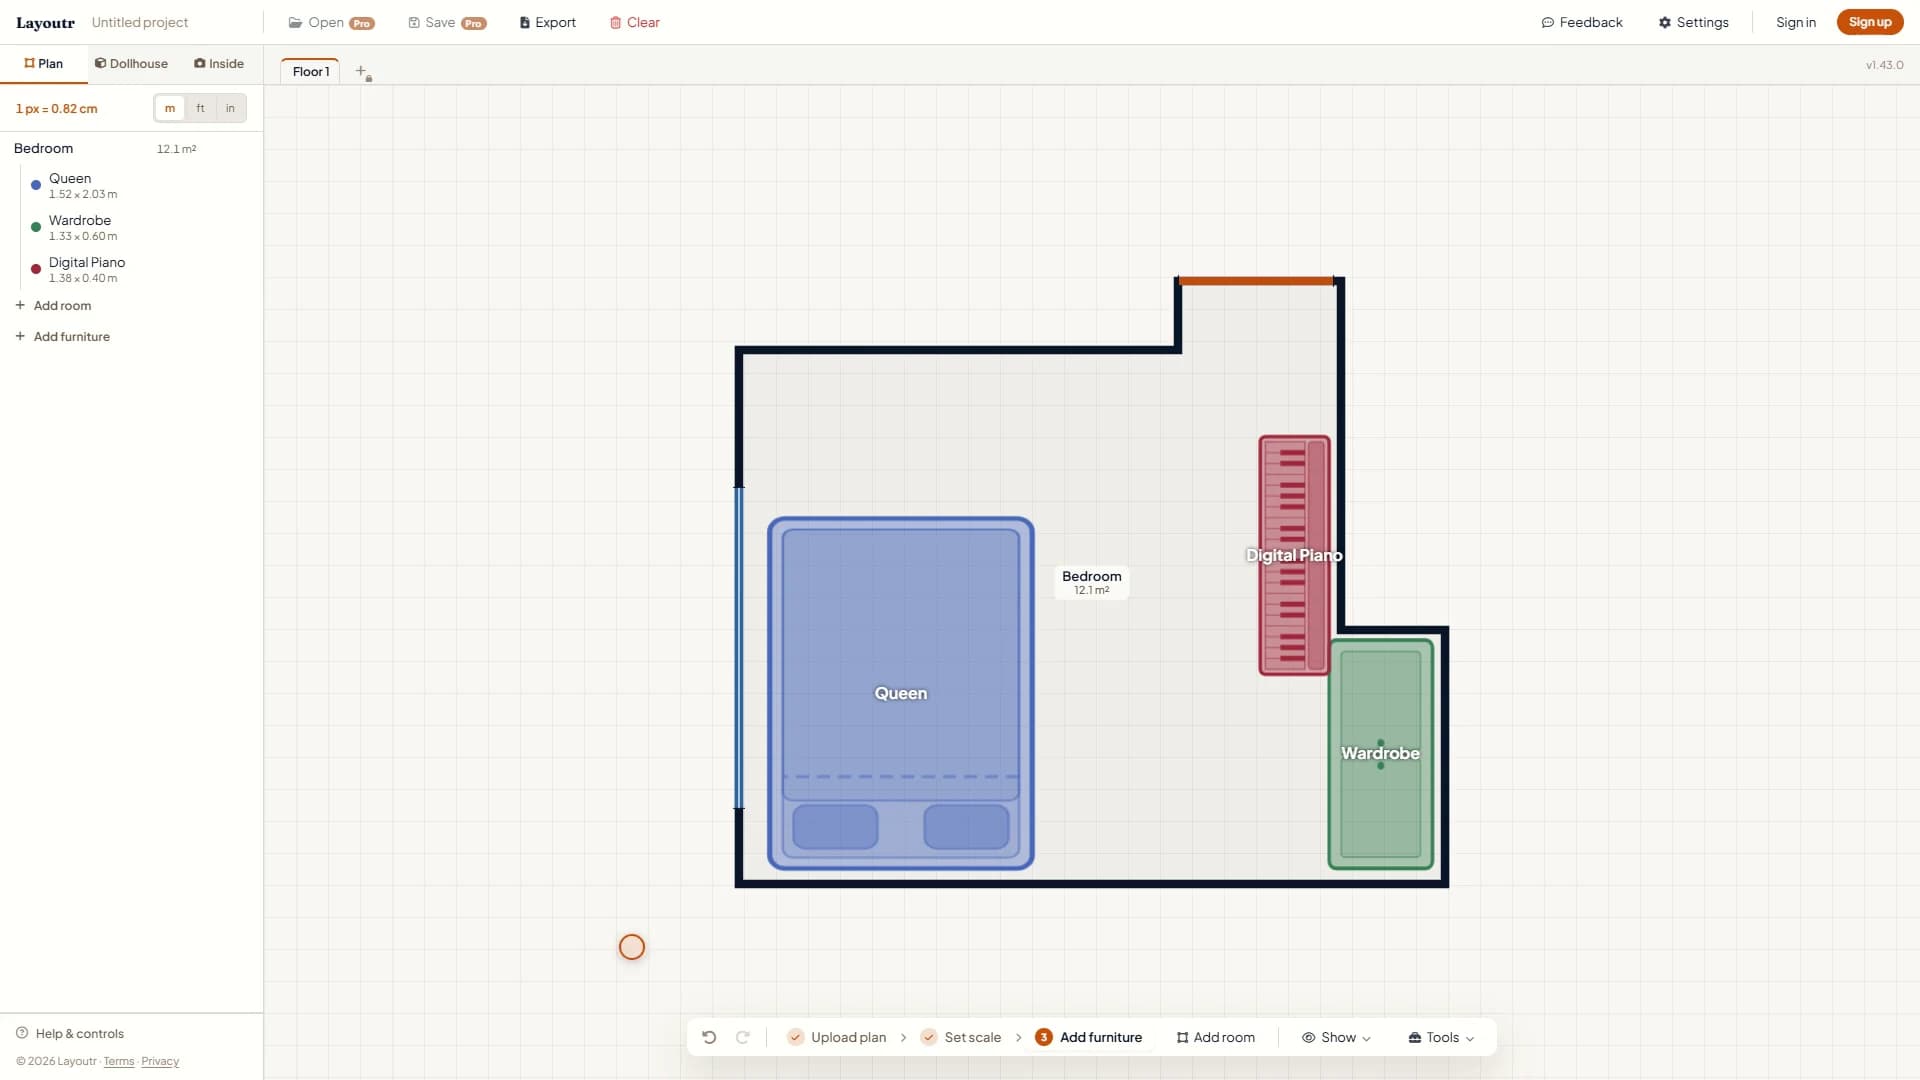
The bedroom, built from measurements alone, with the furniture in it.
Tip
Add the other rooms the same way. Drag a room by its body and its edges snap to neighboring rooms, so shared walls line up instead of doubling.